Step 8 of 10: Condition Monitoring
CONDITION MONITORING
CONDITION MONITORING
Steps 4 through 7 control contamination at every physical checkpoint. Step 8 answers the question none of them can: is it actually working? Oil doesn't just lubricate - it tells you, in advance, when something is going wrong.
PRIMARY RISK
Undetected wear and degradation
GOVERNS
Sampling, testing, trending, alarm limits
FEEDS INTO
Step 9 (Environmental Control) & CMMS work orders
WHY IT MATTERS
WITHOUT MEASUREMENT, MAINTENANCE STAYS REACTIVE
Contamination exclusion (Step 7) and clean handling (Steps 4–6) reduce the rate at which things go wrong, but they don't tell you whether they're working on a specific machine, today. Condition monitoring closes that gap. Through oil analysis, small problems are identifiable well before they become failures: contamination, additive depletion and early wear are all detectable via targeted tests.
Without condition monitoring, maintenance stays reactive by default. With it, you move to a predictive, proactive strategy that reduces unplanned downtime and extends equipment life.
"HOW OFTEN SHOULD I ANALYSE MY OIL?"
THERE'S NO SINGLE ANSWER
Frequency depends on how critical the equipment is, the environment it operates in, and usage patterns. High-value or critical machinery is commonly tested monthly; less-critical assets may only need quarterly intervals. What matters most is consistency, irregular testing can't build the trend data that makes condition monitoring worth doing in the first place.
WHAT OIL ANALYSIS ACTUALLY MEASURES
- Viscosity - variations can indicate fuel dilution, oxidation, or the wrong oil in use
- Water content - accelerates corrosion and additive breakdown
- Particle count (ISO 4406) - measures solid contamination levels, the same metric Step 4 set targets for
- Wear metals - indicate internal component wear (iron, copper, lead)
- Oxidation and acid numbers (TAN/TBN) - signal oil degradation
- Additive condition - shows how much of the oil's protection remains
BUILDING THE PROGRAMME
Eight steps from first sample to working system

1. Define Objectives
Set goals like reducing downtime, extending equipment life, or optimizing oil changes. Select critical equipment based on failure impact.

2. Install Sampling Hardware
Install sample ports downstream of bearings and gears but upstream of filters. Ensure safe and consistent sample collection while equipment is running.

3. Establish Baselines
Take baseline samples from new equipment or after oil changes. Set sampling frequency by equipment criticality and operating environment.

4. Choose Analysis Partner
Decide between an accredited off-site laboratory or on-site analysis equipment — or a hybrid approach balancing capability and speed.

5. Define Test Slates
Work with your lab to select standard tests per equipment type: elemental spectroscopy, viscosity, water content, and particle counting.

6. Train Personnel
Ensure everyone taking samples is trained in proper technique to prevent contaminating the sample itself. Document sampling locations and frequency.

7. Set Action Limits
Establish multi-tier alarm limits based on OEM guidance, industry standards, and historical trend data from the specific machine, not a generic threshold.

8. Integrate Systems
Connect to your CMMS so alarms automatically generate work orders, and corrective actions get tracked, this is what closes the loop that Step 3 started.
"Measure what matters,
maintain what's measured"
FROM DATA TO DECISION
A measurement has little value unless it leads to a decision.
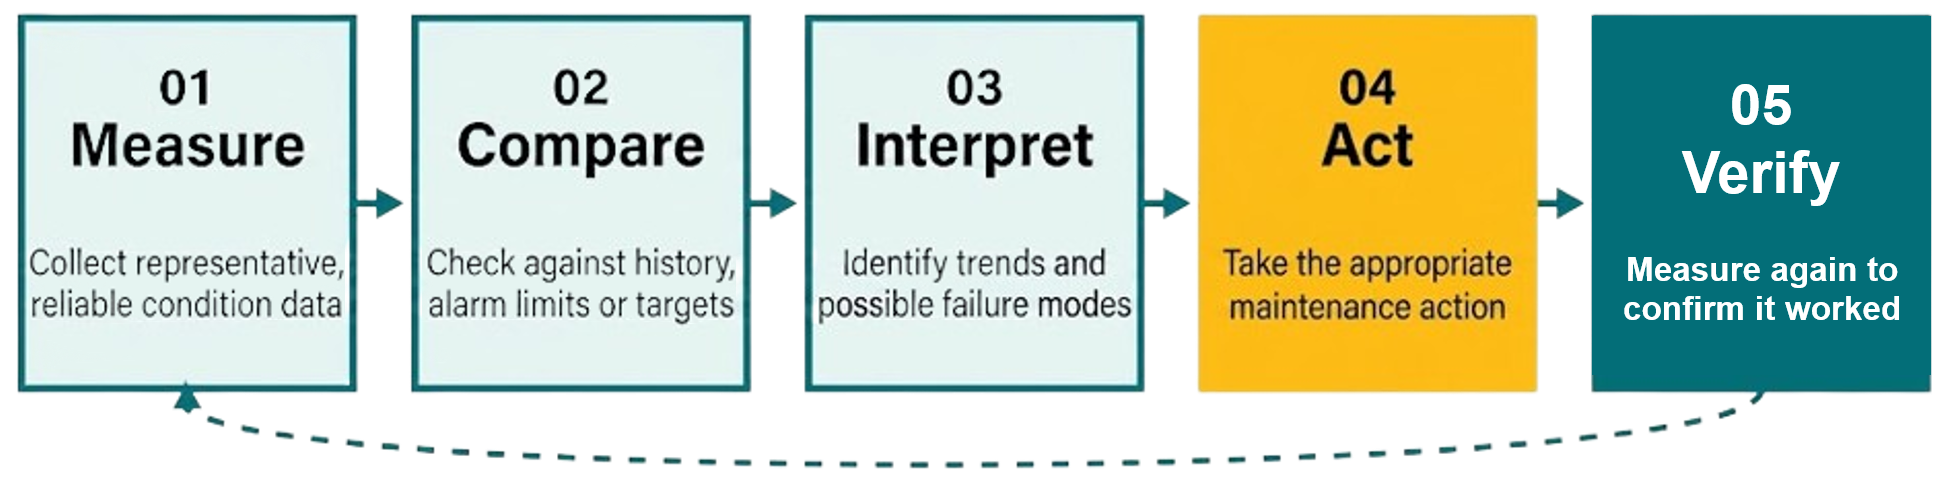
Verification feeds back into the next measurement - condition monitoring is a loop, not a one-off check.
"Trend the condition. Don't just record the result."
WHY TRENDING MATTERS MORE THAN ONE-OFF RESULTS
One test only gives a snapshot. Trend analysis shows whether the oil — and the machine — is improving, stable, or degrading. Monitoring particle count, viscosity or wear metals over time reveals problems before they become visible or costly.
- Establishing baselines - every machine has a unique wear-and-contamination fingerprint tied to its operating conditions.
- Identifying patterns - a steady rise in wear metals often signals progressive bearing wear.
- Early warning - wear metal levels typically rise before vibration or temperature symptoms appear.
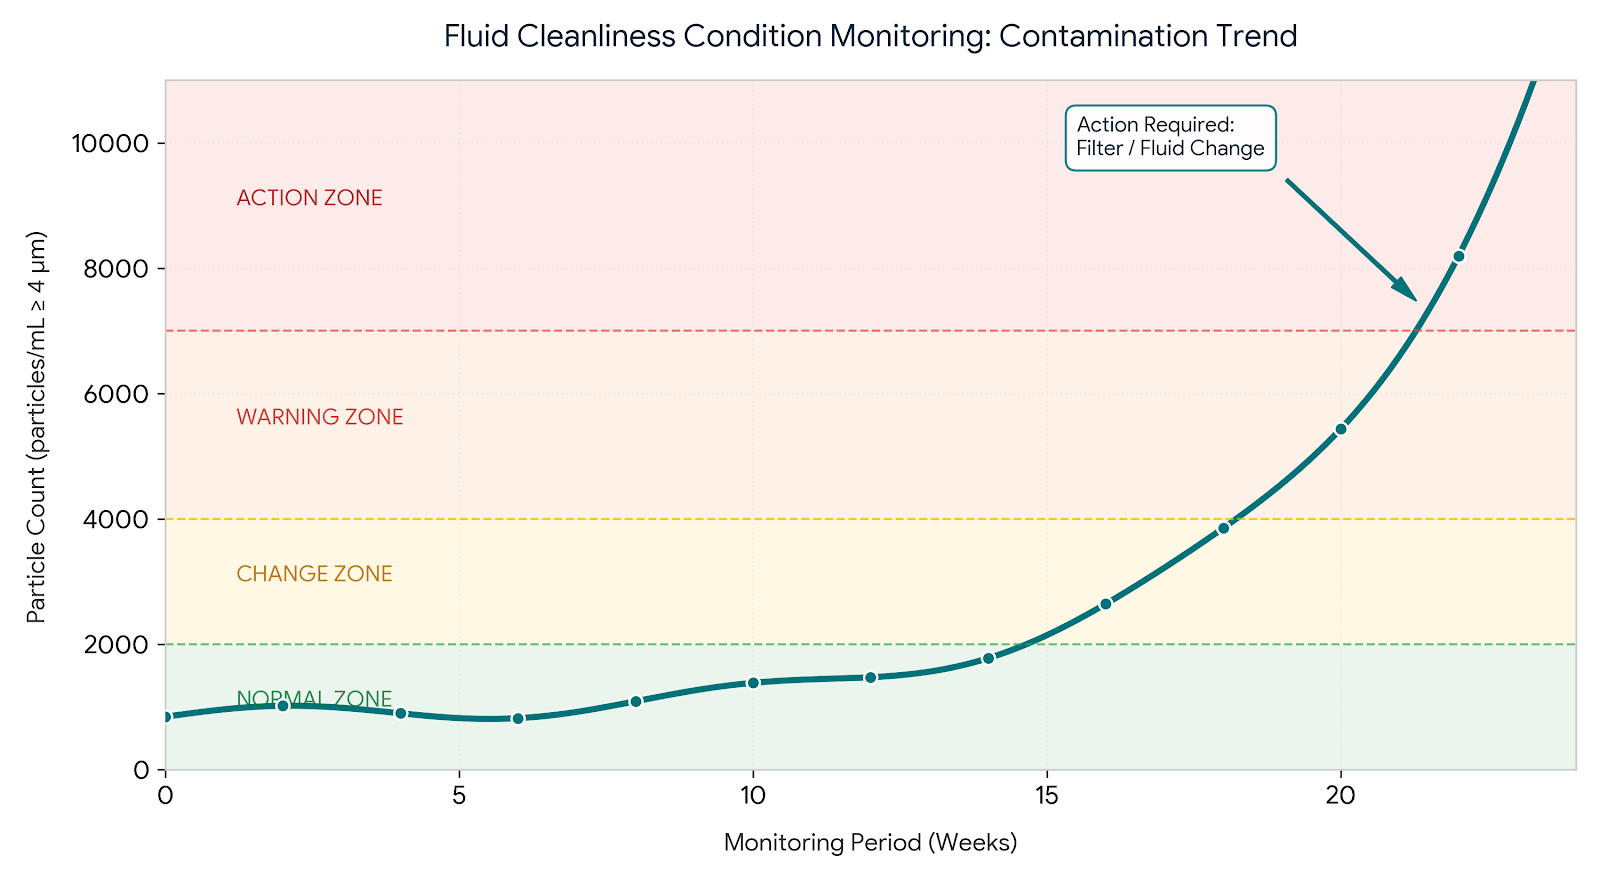
Condition monitoring is not a one-time task. Testing oil once and drawing a conclusion is a common trap; regular, consistent testing is what builds the baseline that makes any single result meaningful.
SAMPLING MATTERS
A laboratory cannot correct a poor sample
Good data starts with a good sample: the correct location, clean equipment, a consistent procedure, the right interval, correct labelling, and results compared over time rather than read in isolation.
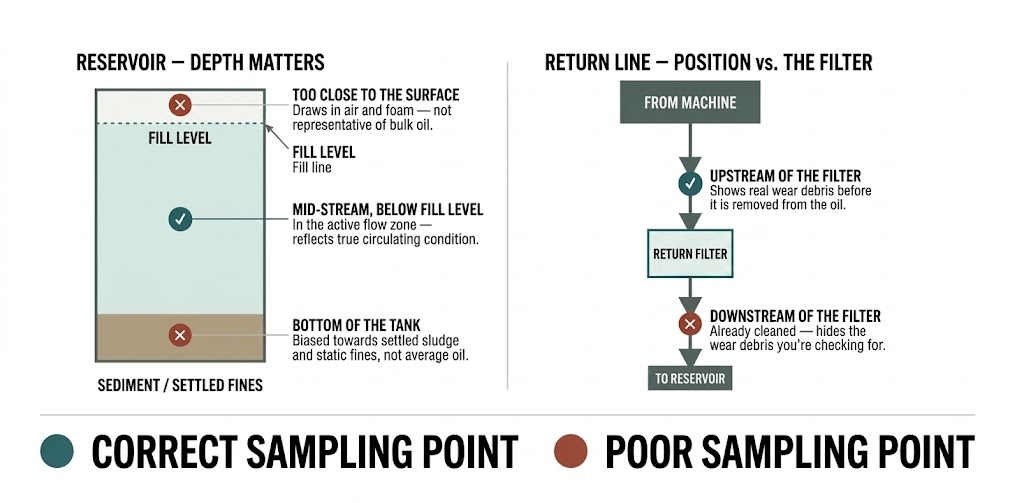
The right sample is taken mid-stream, below the fill level, and upstream of the return filter,
where the oil best reflects what the machine is actually generating.
Lubretec supplies the equipment that makes this practical in the field - from vacuum pumps and sampling bottles to the EZ-SAM automatic oil sampling pump, and arranges testing through an ISO-accredited lab partner rather than running an in-house lab.
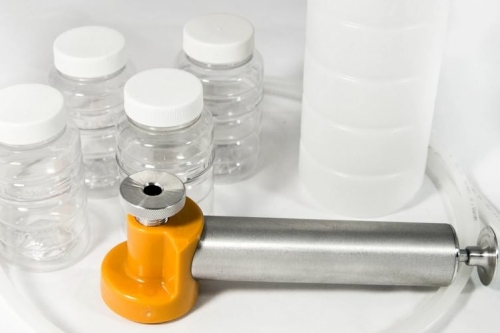
Vacuum
pumps
pumps
Clean, controlled draw for representative sampling
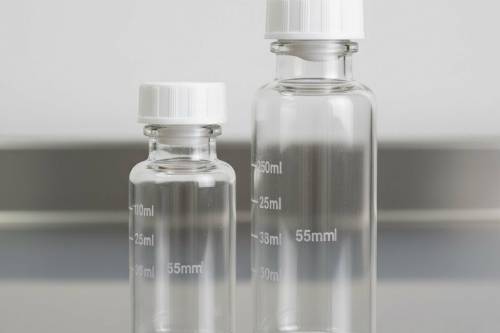
Sampling
bottles
bottles
Sealed, contamination-free HDPE bottles
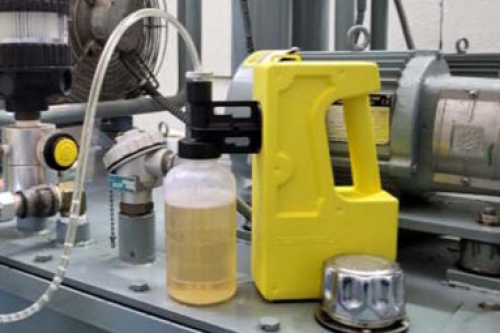
EZ-SAM
pump
pump
Automatic sampling for consistent repeatable draws

Oil analysis
tests
tests
Test packages via our ISO-accredited lab partner
See the full sampling toolkit and lab-backed test packages, including how a sample is logged, tested and reported.
What condition monitoring gives your maintenance team
What condition monitoring gives your maintenance team

Earlier warning
Identify abnormal conditions before failure.

Better maintenance decisions
Base interventions on actual equipment condition.
Less unnecessary maintenance
Less unnecessary maintenance
Avoid replacing lubricant or components simply because a calendar interval has been reached.

Improved failure analysis
Improved failure analysis
Use condition data to identify developing failure mechanisms.
Better lubricant management
Better lubricant management
Know when lubricant condition is changing and when action is required.
Higher equipment reliability
Higher equipment reliability
Turn condition information into targeted maintenance actions.
PART OF THE LUBRICATION RELIABILITY™ JOURNEY
Protecting the lubricant is only half the job. You also need to know whether it is still doing its job.

THE LUBRETEC APPROACH
Lubretec helps maintenance teams implement practical condition-monitoring solutions: oil sampling equipment, oil analysis through an accredited lab partner, clean and representative sampling, particle and cleanliness monitoring (ISO 4406), and supporting condition-monitoring equipment for data-driven maintenance decisions.
The right monitoring strategy depends on the machine, lubricant, operating conditions, criticality and failure modes, not on a fixed product list. Our oil analysis services and sampling tools page covers the full toolkit and what happens to a sample after it leaves your site.
SELF-ASSESSMENT
Is your condition monitoring actually predictive, or just occasional?
- Is every critical asset on a defined, consistent sampling schedule?
- Are sample ports installed downstream of bearings/gears, upstream of filters?
- Do you have a documented baseline for each critical machine?
- Are multi-tier alarm limits set per machine, not applied as one blanket threshold?
- Is oil analysis integrated with your CMMS so alarms generate work orders automatically?
- Are results reviewed as trends over time, not judged on a single test?
If sampling happens "when someone remembers," you have oil analysis - not condition monitoring.
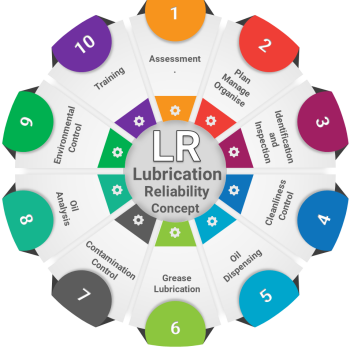
HOW THIS FITS INTO LUBRICATION RELIABILITY™
① Assess & Benchmark
② Organise & Plan
③ Identify & Inspect
④ Cleanliness Control
⑤ Dispense Precisely
⑥ Grease Effectively
⑦ Control Contamination
8 Condition Monitoring
⑨ Environmental Control
⑩ Knowledge Management
Steps 4–7 build the physical defences.
Step 8 is the feedback loop that proves they're holding, every alarm it raises should trace back to a gap in one of the earlier steps.
Get it right, and Step 9's Environmental Controls are targeted at real, measured risk instead of a general sense that things could be cleaner.
Ready to take control of your equipment health?
Ready to take control of your equipment health?
Lubretec helps you build a structured condition monitoring programme using oil analysis and data interpretation to reduce risk, downtime, and maintenance costs.